Light and Easy Summer Pasta with Zucchini

Zucchini Pasta

I love making simple tasty pasta dishes, especially now that it’s summer. This recipe is so simple that I almost didn’t post it. But seeing as The New York Times prides itself on publishing the simplest pasta dishes, I decided, why shouldn’t I!

What I love about this is the the “liquidy” part of the sauce is basically the pasta water, which makes the whole process so very easy. And don’t leave out the lemon – it gives it that fresh zing that’s perfect for summer meals, elevating this dish from hum-drum to yum-yum.

ZUCCHINI PASTA

Ingredients

500g (1 lb) pasta (you can use whatever you like, from spaghetti to penne to any pasta shape you enjoy)

2-3 tablespoons olive oil

2 large zucchinis quartered lengthwise and sliced thinly

1 medium-large onion cut in quarters and thinly sliced

At least 10 cloves of garlic peeled and thinly sliced (don’t crush – slicing makes them so much tastier and the garlic won’t burn either.)

Juice of half a medium-sized lemon

Salt and pepper to taste

Grated Parmesan cheese to taste (leave out if you want to serve as a vegan or Parev dish)

How to do it

  1. Boil your pasta in lots of salted water
  2. In a large pan, add the olive oil, and over medium-high heat, saute the zucchini and onions for about 5 minutes and then add the garlic. Continue to saute until the zucchini and onions start to brown a little (don’t let it burn).
  3. When your vegetables are a nice brown color, add about half a cup of the pasta water to the pan and the lemon juice. Stir and allow the vegetables to simmer a little. If you feel like there isn’t enough liquid (there should be liquid covering the full bottom of the pan to no more than half a centimeter (less than a quarter of an inch). Don’t add too much liquid. As soon as you see the pasta water has taken on some of the color of the vegetables (no more than 2-3 minutes of simmering) turn the heat off.
  4. Drain the pasta and combine with the sauce immediately.
  5. Serve with Parmesan cheese and fresh cracked black pepper.

Serves about 4

Light Dairy Pasta for Shavuot

Shavuot – that festival of cheese, cream, milk and indigestion! Often, this one-time-a-year excuse to load our food with diary products results in lactose overkill. Instead of overdoing the dairy, how about a dish that’s light on the diary, heavier on the veggies and the result is tasty and easy on the digestive system.

This is a recipe I threw together when I was vacationing at my sister-in-law’s cottage in Ontario last summer. Our niece was having a birthday, and because she’s a vegetarian, we made a diary vegetarian meal, with the whole extended family pitching in with their contributions – lots of fun and good food.

I opened the fridge and did a bit of forraging. There was a bag of fresh spinach, some sun dried tomatoes, piles of cheese, so I went to work on making a fresh vegetable-based pasta sauce. It went down really well. I made it again recently, trying to remember what I had done. Not sure it’s exactly the same recipe, but it’s one of those recipes that you can adjust according to your own taste (or what’s in the fridge!). Just don’t skip the spinach – it makes the dish. And please, for the love of all that is edible, use fresh spinach only. That frozen stuff is evil and does not in any way resemble spinach as nature intended it.

FRESH SPINACH VEGETABLE PASTA

Ingredients

500 g (1lb) penne pasta (or similar large hardy noodle)

2 tablespoons olive oil

10-15 sun dried tomatoes in oil chopped (not too small)

6-8 cloves of garlic thinly sliced

2 medium sized zucchinis quartered and sliced

2-3 cups of cherry tomatoes quartered

Salt and ground pepper

A pinch of dried oregano

A pinch of dried basil, or a few shredded fresh basil leaves

300 g (10 oz) fresh baby spinach leaves washed

200 g (7oz) Tzfatit cheese or any hard white salty cheese diced into small cubes

Water from the pasta pot

Grated parmesan cheese (optional)

How to do it

  1. Add the olive oil to a large skillet or wok and turn the gas to medium high. Add the sun dried tomatoes, zucchini and garlic and saute till the zucchini starts getting soft (about 5 minutes), stirring every now and again.
  2. Make the pasta in a large pot of salted water.
  3. While the pasta is cooking, add the tomatoes and herbs to the skillet and allow to simmer on low heat till the tomatoes start breaking down. After the tomatoes are softened, add about a cup of the water from the pasta pot to the skillet, and stir and continue to simmer for a few minutes, until the pasta is cooked. Add just enough liquid so that you start getting a sauce, but don’t add too much water so that you dilute the flavors.
  4. Drain the pasta and add it to the skillet or wok (if it’s big enough; if not, return the pasta to the post and add the vegetables to the pot.)
  5. Add the spinach leaves. The heat from the pasta and the sauce will wilt the leaves. If you are using a heavier spinach leaf, then keep the flame on low heat only just until the spinach is wilted – you don’t want to over cook the spinach.
  6. Add the slaty cheese and toss together, and sprinkle some parmesan over the top to serve. Serve immediately. (You can make the first part of the sauce ahead of time – till step 4).

Serves about 6.


Antipasti Lasagna – a Vegetarian Feast

Antipasti Lasagna

Traditional lasagna is not something you’ll be seeing recipes for on this blog. But the lasagna framework is a fun one for trying new things. This recipe is not so new to me. I’ve been making it for years. A couple of months ago I opened by blog to get the recipe (for me, this blog is where I store all my favorite recipes) and I was shocked to find that I had never posted this one. So it’s time to rectify that error.

I cannot say that this recipe is a quick fix dish – it has a few steps and does require time and effort. but the result is just spectacular. The roasted vegetables lighten up the dish and make it a great summer pasta main course, great for vegetarians. Don’t be shy with the vegetables – use your favorite antipasti veggies – the more the merrier.

Ingredients

Antipasti

2 tablespoons oil

4 large  red peppers cut into quarters (I slice the cheeks off the core of the pepper to avoid using the white bits)

1 medium sized eggplant peeled cubed into 2 cm pieces

1 large onion peeled and cut into 8 segments (cut the onion in half then with the round side down, slice from the middle outwards at an angle so you get 4 crescents from each half)

3 medium sized zucchinis cubed into 2 cm pieces

6-7 large mushrooms washed and stemmed cubed into 2 cm pieces or 2 cups of small fresh mushrooms washed,stemmed and quartered

1 whole head of garlic (remove the loose papery skins on the outside by hand but leave the inner layers on)

Coarse salt

(Make sure you have enough cubed vegetables to amply fill a large (European) oven baking tray – about 10 cups full)

Lasagna

1 batch basic tomato sauce without the onion

18-20 lasagna noodles (the ones that don’t require pre-cooking – I use Barilla)


250 g (12 oz) ricotta cheese

1 egg

Salt and ground black pepper

400 g (14 oz) grated mozzarella cheese

100 g (3.5 oz) grated Parmesan cheese

How to do it

Antipasti

1. Pre-heat the oven to 180°C (350°F)

2. On an oven tray lined with baking paper, sprinkle the olive oil and place all the cut vegetables in an even layer, turning them through the olive oil so they are lightly oiled. Make sure the peppers are skin side down. Sprinkle lightly with salt.

3. Place in the upper part of the oven and bake for 20 minutes. Then, using tongs, turn over the peppers and stir the rest of the veggies around. Bake for another 20-25 minutes, or until the pepper skins start blackening.

4. Remove the peppers from the oven (leaving the rest of the veggies to roast if they are not yet cooked through for another about 10 if required). Place the peppers in a small plastic bag, seal and leave them for about 15 minutes while the rest of the veggies cool. Then remove the pepper skins – they should slide off easily.

Lasagna

1. Prepare the tomato sauce as per the recipe, including the red wine but omitting the onion

2. Beat the egg in a medium-sized bowl and add the ricotta cheese, salt and pepper and mix till smooth. Add the cooling antipasti vegetables to the ricotta mixture and gently mix together.

3. Grease a large Pyrex lasagna pan.

4. Spread about 4-5 tablespoons of tomato sauce on the bottom of the dish, just barely covering the whole surface.

5. Arrange one layer of lasagna noodles on top of the sauce (make sure there are no spaces). Break up one of the noodles to fill any gaps.

6. Carefully spread half the antipasti mixture over the noodles, then spread one third of the tomato sauce on top of the antipasti. Sprinkle just under half of the mozzarella over the sauce.

7. Then another layer of noodles, the rest of the antipasti mixture and another one third of the tomato sauce, followed by most of the remaining mozzarella – leaving about half a cup for the top.

8. Add the last layer of noodles and cover with the rest of the tomato sauce. Sprinkle the remaining mozzarella and the Parmesan cheese evenly over the top.

9. Place the lasagna in a pre-heated 180°C (350°F) oven for 30-35 minutes (or until the cheese on top is golden – don’t let it burn).

This serves about 8.


Welcome Summer with an Italian Inspired Salad

Finally! Summer seems to have broken through the grip of the nasty winter. This means a return to colder food, and of course, salads are on the menu.

I recently had to prepare a filling dish that was easy to transport. Nothing like a good old pasta salad to fit this bill. Bored with my regulars, I decided to come up with something new, pretty much hauling out whatever was in my fridge, and it worked!

I was so inspired by the colors of my favorite country in the world to visit – Italy. The red, white and green are covered by the pasta and zfatit cheese (white); roasted red peppers and cherry tomatoes (red); and rocket and basil (green). With a few additional colors abd tastes to round out the flavor, this salad is just yummy, and looks great on a table. You can also adjust the quantities of the vegetables and cheese according to your own preferences.

ITALIAN FLAG PASTA SALAD

Ingredients

500 g (1lb) penne pasta (or any other sturdy noodle)

1-2 cups of roasted pepper pieces (if you’re in a hurry, you can used bottled roasted peppers, or for a more tasty option, roast them yourself – click here for the “how to”).

200 g (7 oz) Tzfatit cheese cut into small cubes (I recommend the Meshek Tzuriel brand – very creamy) If you can’t get Tzfatit, use a very mild feta cheese. For the parev version, just omit the cheese.

½ cup of chopped black olives (I buy the pre-cut olives – saves tons of time)

¾ cup corn kernels

About 15 cherry tomatoes cut into quarters

A large handful of rocket leaves

A small handful of fresh basil leaves chopped

Dressing

¾ cup olive oil

3 tablespoons balsamic vinegar

2 tablespoons red wine vinegar

1 heaped teaspoon grainy Dijon mustard

¼ teaspoon garlic powder

1 teaspoon sugar

Salt and pepper

How to do it

1. Roast the peppers (if you’re not buying). You can prepare them ahead of time and refrigerate. Cut the peeled roasted peppers into small pieces.

2. Prepare the pasta according to the directions on the box. When you drain the pasta, rinse with cold water to cool down quickly and set aside. Rinsing also stops the pasta from sticking together.

3. In a large bowl, combine the pasta, peppers and all the rest of the ingredients and gently toss.

4. Whisk the dressing ingredients together and pour over the salad and mix

Serves about 12 as a side dish.


A new take on an old kugel

Spinach and Salty Cheese Kugel

Spinach and Salty Cheese Kugel

WordPress was misbehaving when I wanted to post this last week, so I posted it directly to Facebook, and  now I can finally add it here. So it’s a bit late for Shavuot here, but you really can serve this whenever you want with any dairy meal. It’s a modern twist on the old fashioned kugel. Instead of the traditional sweet elements like sugar and raisins, this version uses spinach and salty cheese for a slightly healthier take. Don’t worry – it’s still full of starch and oil, so the Ashkenazi cuisine markers are still present.

Spinach and Salty Cheese Kugel

Ingredients

500 g (1 lb) fettuccini (or any other flat) noodles
600 g fresh spinach
1/3 cup olive oil
4 large eggs (or 5 medium)
250 g (1/2 lb) feta or Bulgarian cheese (feta is saltier…) cut into small cubes
200 g ricotta cheese
Salt and pepper to taste (adjust depending on the saltiness of the cheese you use)

How to do it
1. Pre-heat the oven to 170°C (325°F).
2. Cook the pasta in salted water according to the instructions will just al dente. Strain and add some olive oil and mix so the pasta doesn’t stick together. Set aside to cool.
3. While the pasta is cooking, rinse and chop the spinach finely. In a large unoiled skillet or wok, saute the spinach until soft. Remove from the heat and place in a strainer to get rid of excess liquid.

Mix the spinach with the pasta and eggs

Mix the spinach with the pasta and eggs

4. In a very large bowl, beat the eggs. Add the oil, cheeses, salt pepper and mix. Add the pasta and the spinach and mix so that the spinach is evenly mixed throughout.
5. Grease a large deep baking dish. Place the kugel mixture into the dish and flatten with a spoon. Cover with foil. Bake for between 1.75-2 hours. Remove the foil. If the kugel hasn’t slightly browned, then increase the temperature of the over to about 200°C (400°F) and bake for another 5 minutes. Otherwise remove from the oven, cut into small wedges or squares and serve.

Serves about 12-15 as a side dish.

Get Adventurous with Gnocchi

Home made gnocchi with tomato sauce and Parmesan cheese

Home made gnocchi with tomato sauce and Parmesan cheese

Having read the headline, some of you are probably mentally throwing schnitzel hammers at me. But just hold onto them for a moment…

The thought of making your own gnocchi may be daunting, but don’t let it daunt you. It’s actually not very difficult to make, but needs a little patience and self-belief. The fact is, there is nothing that taste quite as delicious as home made gnocchi fresh out of the pot. This first time I made these was years ago, after seeing them being made on a TV cooking show. I was amazed by how well they worked. I made these again a few weeks ago, thinking I’d get two batches out of them and freeze one batch for another meal. My family raged against the thought after I served the first round, and insisted that I take the second batch out of the freezer and cook them as well. Fortunately, like all fresh pasta, they cook really quickly.

There are some points to note before embarking on your gnocchi journey. First, the drier the baked potatoes, the better. To this end, in Israel, where potatoes are notoriously watery, the best course of action is to bake the potatoes the day before and leave them in the fridge overnight. This will dry them out.

Secondly, because the water content of potatoes varies from potato to potato, the flour measurements I have here are very approximate. The trick is to slowly add flour, first stirring with a spoon and then using your hands, until your dough just reaches the consistency that will allow you to roll it into a sausage for cutting. But don’t allow it to become too tough – the softer the better.

Thirdly, and this is based on trial and error, popping the gnocchi into the freezer for about an hour before you boil them will make it a lot easier to throw into the pot and will ensure that they don’t fall apart when boiling. They freeze really well, so you can cook them ahead of time and throw them straight into the pot from the freezer. The cooking process is very short, so it will really save you time.

I serve this with a simple tomato sauce and some shaved Parmesan cheese on top. But you can serve it with any sauce you like.

HOME MADE GNOCCHI

Ingredients

3 large baking potatoes

3 egg yolks

1½-2 cups flour (or as much as you need to get to a soft rolling consistency) – use “00” flour, which is available in supermarkets in Israel now.

1 teaspoon salt

Freshly grated Parmesan cheese (as much as you want!)

How to do it

Very soft dough

Very soft dough

1. Take a deep breath and believe that this isn’t as difficult as you think.

2. Preheat the oven to 200°C (400°F) and place the unpeeled, washed and dried potatoes on a baking tray. Bake for about 1 hour or until completely soft – a fork should very easily slide into a potato. If you have time, allow the potatoes to cool and refrigerate overnight (recommended).

Cut the gnocchi into small pillow shaped pieces

Cut the gnocchi into small pillow shaped pieces

3.  Cut the potatoes in half and scoop the potato out of the skin. Place in a bowl and mash until smooth. Add the yolks and salt and mix, and then add the flour, slowly mixing with a spoon until the dough reaches a soft but pliable consistency, and then use your hands to mix (the dough may be a little uneven, and not necessarily completely smooth like bread dough – this is fine.)

On a baking tray and ready for cooking

On a baking tray and ready for cooking

4. Divide the dough into four pieces. Dust a rolling surface and a wooden rolling pin with flour, and dust your hands with flour as well. Roll each piece into a long sausage of about a 2 cm (just under 1 inch) diameter. The dough should be quite soft, so be gentle. With a small, sharp knife cut pieces that are about 1 cm long (half an inch). Don’t stress about exact sizes – this is a rustic dish and doesn’t have to look magnificent. Repeat the process for all the dough.

5. Place the gnocchi pieces on trays lines with baking paper and place in the freezer for about an hour (or longer as needed – they freeze well for a few days).

6. In a large pot, bring about 2 liters of salted water to the boil. Drop about half the gnocchi in the water. When they all rise to the surface of the water, remove them carefully with a slotted spoon allowing all the water to drain, and place in a dish. This will take only a few minutes. Repeat with the rest of the gnocchi.

7. Serve with a simple tomato sauce.

Serves about 4.

Spaghetti Bolognese: The quick after school lunch

Spaghetti Bolognese

Yesterday my kids whined: “There’s nothing to eat in the house!” This usually happens when all the food I cook for Shabbat gets eaten on Shabbat. This past Shabbat was the case, when my son sprang a few very last minute dinner guests on me. Fortunately I always make a lot of extra food for Shabbat so there’ll be leftovers for lunches during the week. But a group of hungry 14-year-old boys meant this was not to be. So to stave off mid-day hunger, I decided that the quickest meal I could come up with with the least effort was Spaghetti Bolognese.

I’ve seen so many recipes for making this simple meat and tomato sauce. Many of them are convoluted and involve a lot of ingredients. But my favorite recipe was one I saw on a TV show several years ago. I don’t even remember who the chef was, but it was a jolly man who was taking a culinary journey (what else?) through Italy, and sharing secrets of authentic Italian cooks. His take on Spaghetti Bolognese was so basic and easy that I tried it, loved it and this is what I’ve been making every since. He dispenses with the extra vegetables, and keeps the flavors simple and to the point, in keeping with the traditional Italian way. The result is a tasty, filling and quick meal.

For me, this is the very quick alternative to spaghetti and meatballs, which take more effort, and isn’t a 15-minute meal. It’s also a great easy cook for those starting cooks looking for the quick and easy recipes.

Needless to say, my kids stopped whining about the lack of food, and tucked into a hearty mid-day meal with gusto, insisting that I cook like this more often. They really aren’t very difficult to please.

SPAGHETTI BOLOGNESE

Ingredients

1-2 tablespoons olive oil

1 small onion finely chopped

2-3 cloves of garlic crushed

500 g (1 lb) ground beef

1 800 g (28 oz) can of crushed tomatoes

100 g (3.5 oz) tomato paste

½ cup dry red wine (optional)

1 teaspoon dried oregano

1 teaspoon dried basil

Salt and black pepper

1-2 teaspoons sugar (to taste)

500 g (1 lb) spaghetti (I use at least Number 5 size for a nice bite)

How to do it

1. In a large skillet or wok, heat the olive oil and saute the onions until they are soft (do not brown them)

2. Add the garlic and saute for less than a minute (make sure not to let the garlic burn)

3. Add the ground beef and fry until all the meat is browned (no pink pits are left)

4. Add the crushed tomato and tomato paste and mix well.

5. Add the spices and the wine (optional). Mix together. Bring to the boil and then turn down the heat and allow the sauce to simmer for up to 20 minutes until the sauce is thick and any liquid has cooked down. (If you aren’t using the wine, you can simmer for less time as you will not have to cook off the liquid from the wine.)

6. Cook the spaghetti according to the instructions. Drain and add the sauce, mixing well.

Serves about 6.

Naughty, naughty Qantas Pasta

Let’s start the new week on a naughty note.

I very rarely make cream sauces – they’re a little hard on the digestion and extremely hard on the diet, so overall, I don’t use cream when I cook. I make one exception once in a blue moon though.

Three years ago, our family went on a spectacular trip to Australia. Part of our one month down under involved flying around the very large country. The flights were up to three hours long, so when the cabin crew would hand out “food”, which was usually a very pink meat sandwich, I would always decline. On one flight, an insistent flight attendant persuaded me to try the vegetarian option. In spite of my policy to avoid airplane food whenever possible for obvious reasons, I agreed. So imagine my surprise when I started eating my vegetarian airplane pasta and discovered that it tasted really good. I was almost embarrassed to admit to my family that I had eaten food on a plane that I really liked and wanted to eat again!

The dish I was eating had roasted pumpkin, peas and spinach with pasta. I knew that when I got home I’d have to try to replicate it. Eventually, when we returned home from the other side of the planet, I went out and bought what I thought should be the ingredients. I came up with a rather similar version of the dish, which I dubbed Qantas Pasta, as a homage to the airline that managed to serve a dish that not only was edible but also replication-worthy.

QANTAS PASTA OR PASTA WITH ROASTED PUMPKIN, PEAS AND SPINACH

500g (1 lb) fettuccine or penne noodles

Pasta with Roasted Pumpkin, Peas and Spinach

Olive oil

About 400g (14 0z) pumpkin cut into large cubes (about 6-7 cm/3 inches)

About 300g (10 oz) fresh spinach leaves washed and chopped

1 cup frozen peas

4-5 clove garlic thinly sliced or roughly chopped

250 ml (8.5 fl oz) sweet cream (avoid using non-dairy cream as it’s usually sweetened and this will make the dish too sweet.)

½ tablespoon cornflour

¼ cup milk

Nutmeg

Salt and pepper

Parmesan cheese

How to do it

1. Pre-heat the oven to 180°C (350°F)

2. Cover a baking tray with baking paper and lightly grease with some olive oil. Place the pumpkin cubes on the tray and bake for up to an hour or until the pumpkin is cooked through (don’t overcook or it will get too mushy in the sauce) Allow to cool and cut into smaller cubes.

3. Place the spinach in an ungreased large wok or skillet and add some freshly grated nutmeg and wilt over medium heat for about a minute, until just soft. Remove and set aside.

4. Add some olive oil to the wok and on a medium flame, saute the garlic until it just starts to get golden. Add the cream, salt and pepper, turn up the heat and allow to start bubbling. While the cream is heating up, mix the cornflour in the milk until it dissolves completely. When the cream starts bubbling, add the cornflour liquid while stirring the cream. The sauce will start to thicken slightly. Add the vegetables and allow them to just heat through in the sauce on medium heat (about 4-5 minutes) and then remove from the flame and set aside covered.

5. Cook the pasta according to the directions on the package.

6. Combine the sauce and the pasta and grate some Parmesan cheese over the top before serving. (Try to cook the pasta at the same time as the sauce so the sauce doesn’t get cold and require reheating. If you can’t, then give the sauce a quick reheat before combining with the pasta.)

Serves about 6.

Pasta e Fagioli: Hearty Taste, Hearty Memories

Not only Rafael Nadal has an Uncle Tony. When I was growing up in South Africa, my best friend Marianna’s father, also one of my parents’ closest friends, was Uncle Tony (very common back then to call parents’ friends “uncle” or “aunty”). I have the strongest memories of hanging out in their kitchen with Marianna, while Uncle Tony nursed a massive pot of  pasta sauce made from fresh tomatoes, which had sun ripened on their kitchen window sill. He would let the sauce to simmer for hours, walking past it every now and again to give it a loving stir and a taste.

Uncle Tony immigrated to South Africa from Italy after World War II, and brought to our little provincial outpost a sorely needed injection of authentic Italian cooking. A meal at their house involved huge helpings of mouth-watering pasta, accompanied by Uncle Tony, fussing around the table, never sitting down, and making sure that everyone was eating more than their fill: “Eata sum mora,” he would say in his thick Italian accent. And we did.

Besides his classic fresh pasta sauce, one dish that he taught my mother to make was Pasta e Fagioli, (pasta and beans). This hearty, peasant-style pasta dish filled with beans and the holy trinity of Italian vegetables, became a staple in my house. When I came to live in Israel, I didn’t bring the recipe with me, because, I didn’t bring any recipes with me, and it seemed that this dish was to become a thing of the past! But when received a gift of the classic vegetarian cook book “The Vegetarian Epicure”, in it was the recipe for Pasta e Fagioli. Rediscovered, I followed the recipe and it was perfect, conjuring up the exact taste and aroma that took me straight back to Uncle Tony’s kitchen,  in Cape Town in the 1980s.

Pasta e Fagioli

I make this dish regularly in the winter as it’s such perfect comfort food. It does involve a little work and more than one pot, but the result is a very filling and satisfying pasta with lots of nutritional value.  Many recipes have this as a soup dish, but I prefer serving it as a less liquidy side or main dish.

This post is dedicated to the memory of Uncle Tony.

PASTA E FAGIOLI

Ingredients

1½ cups dried navy beans or any small beans

¼ cup olive oil

2 bay leaves

4 cloves garlic

4 peeled carrots

3 stalks celery

1 large onion

4 cloves garlic crushed

1 teaspoon dried oregano

1 teaspoon dried basil

Salt and ground black pepper

1 large can (800 g/28 oz) whole peeled tomatoes

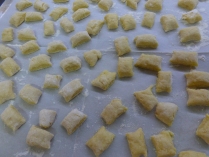
500 g (1 lb) shell macaroni

Chopped fresh parsley and grated Parmesan cheese for serving (optional)

How to do it 

Soak the beans overnight

1. The night before, soak the beans in 6 cups of water in a large pot.

2. The next day, add the ¼ cup olive oil, bay leaves, garlic cloves, 1 teaspoon salt to the pot and bring to the boil. Turn down the heat and simmer until the beans are tender (this can take from about 45 minutes up to 2 hours – it’s important to check and make sure they are cooked through.) Once they are cooked, drain the the beans and save the liquid for later use. Throw out the bay leaves and garlic.

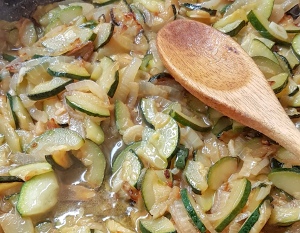
Onions, carrots, celery: The Holy Trinity of Italian cooking

3. Chop the carrots, celery and onion into small pieces and in a large skillet or wok, saute them in hot olive oil. Add the crushed garlic, oregano, basil, salt and pepper, and allow to saute until the carrots are tender (about 15-20 minutes).

4. Dice half of the tomatoes and add to the skillet. Cover and allow to cook for another 10 minutes.

Sauteed and seasoned vegetables

5. Meanwhile, cook the macaroni until just before al dente (about 1 minute less than recommended on the package). This is important as the macaroni continues cooking later on in the dish, and will soften further.

6. Dice the rest of the tomatoes. Add the vegetable mix, the macaroni and the rest of the tomatoes to the bean pot. Then add about 1½ cups of the bean liquid you set aside, as well as the juice from the tomatoes. Mix gently, add extra seasoning to taste, bring to the boil, reduce the heat to low, cover and simmer for another 10-15 minutes. Note: Save the remaining bean liquid for use in heating up any leftovers.

Putting it all together

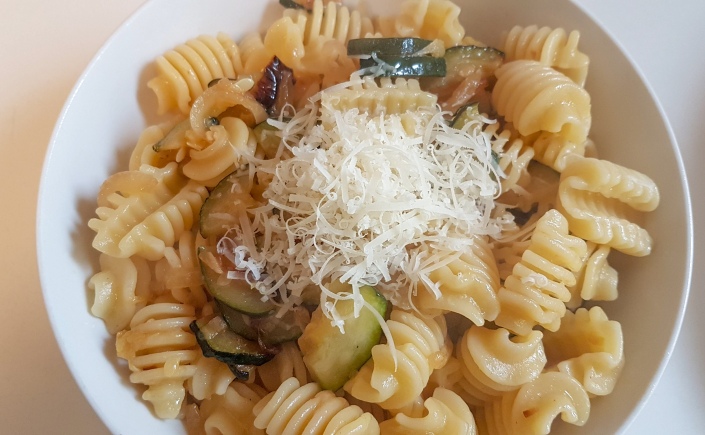
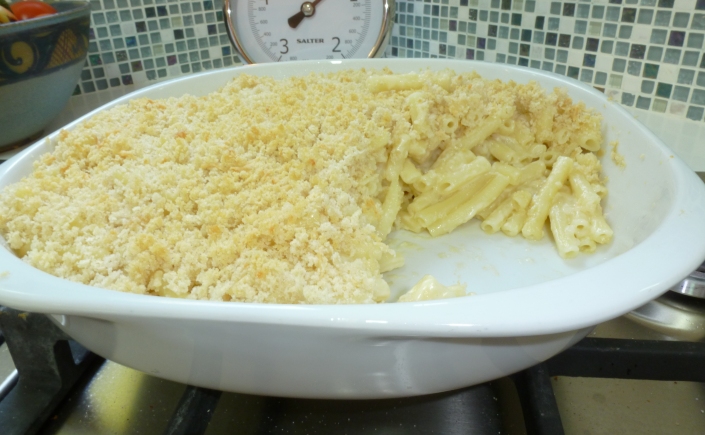
7. Pour into a large serving dish and garnish with parsley and Parmesan cheese if you wish.

Serves about 8.

Traditional Mac and Cheese for these Cold Rainy Days

It’s been raining virtually non-stop in Israel this winter. I can’t remember a winter where it rained this much. On days like today, when the rain is incessant and it’s cold and nasty outside, all I can think about is feeding myself and my family on some hot, creamy macaroni and cheese. As comfort food goes, it’s way up there with the greats like minestrone soup and beef stew. Only my quick version takes a lot less time and makes everyone happy because how can you go wrong with pasta and cheese?

For the traditionalists, I do make a proper version, with a béchamel sauce base. This version is more work (by that I mean stirring) and includes butter, which I don’t use in my quick version. For those with keen taste buds, the béchamel sauce version is definitely superior and tastes wonderful. On the other hand, my quick version is yummy, filling and I’m still waiting for the first complaint. When I have the energy, I make the proper version, and I’m always glad when I do. But don’t feel bad about taking the short cut.

TRADITIONAL MAC AND CHEESE 

Mac and Cheese

Ingredients

500 g (1 lb) noodles (macaroni, mini penne, or elbow)

2 cups grated cheddar cheese

2 cups milk

¼ teaspoon garlic powder

1 teaspoon smooth Dijon mustard

Salt

For the béchamel version: 4 tablespoons butter and 4 tablespoons flour…or

For the quick version: 2 tablespoons corn flour and about ¼ cup of cold milk

About 2 cups breadcrumbs

2 tablespoons oil

¼ cup finely grated Parmesan cheese (optional)

How to do it

1. Pre-heat the oven to 160°C (320°F)

2. Cook the pasta according to the directions.

Melt the grated cheese in the sauce

3a. For the  béchamel version: In a saucepan, melt the butter over low heat, then slowly stir in the flour and mix together for a 3 minutes until smooth and light brown in color. Very slowly, start adding the milk, while stirring. Keep stirring over low heat until the mixture thickens (this will take about 5 minutes, be patient and don’t stop stirring). Once the mixture thickens, add the garlic, salt and mustard and mix well. Then add the grated cheddar, mix till melted and remove from the heat.

3b. For the quick version: Heat the milk over medium heat in a saucepan, adding the salt, garlic powder and mustard. In a small bowl or cup, mix the cornflour into the cold milk until it has dissolved and there are no thick bits at the bottom. When the milk starts coming to a boil, add the cornflour while stirring. The mixture will thicken up very quickly. Turn the heat down to low and allow the mixture to bubble for about a minute. Add the grated cheddar, mix till melted and remove from the heat.

4. Drain the pasta and mix the sauce into the pasta. Pour the mixture into a large greased oven-proof dish.

5. In a small bowl, mix together the breadcrumbs and the oil, and if desired, the Parmesan cheese (recommended). Sprinkle evenly across the top of the dish. Bake for about 25 minutes, or until the top starts browning.

Makes 6-8 servings.